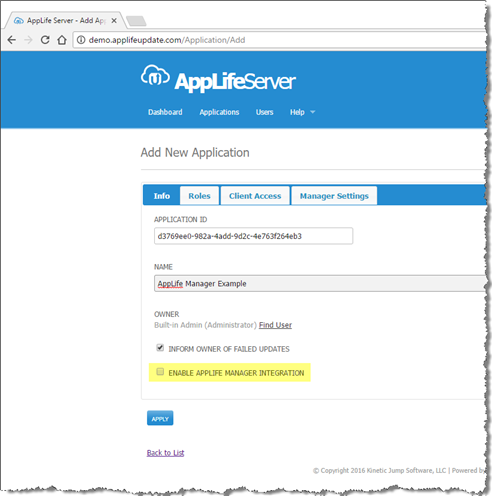
1. Create an application on your AppLife Server, or provision a new application on the AppLife Cloud.
Note the Enable AppLife
Manager Integration checkbox. The AppLife Manager client service will
not “see” this application until this setting is enabled. The default
value is disabled. Leave this setting disabled until the configuration of
this application is completed and we are ready to expose the application to your
deployed clients.
The default Client Access setting is for
anonymous access. This can be changed under the Client Access
tab. We will come back to this later in the walkthrough. Initially,
we’ll stay with anonymous access.
AppLife Manager settings can be
configured under the Manager Settings tab. For initial
configuration, it is better to walk through the New Project wizard within the
Make Update build tool. This process will synchronize the update project file
with the server settings.
2.
Launch AppLife Make Update and select to create a new project…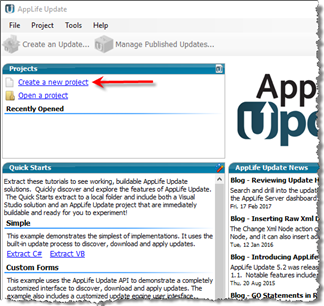
Select AppLife Manager Maintained
Application and click Next.
Enter your server URL and publishing
credentials, then click to login. Once logged in, click Next to
continue.
You will see a list of all applications for which you are a
publisher, and has not yet been configured to use AppLife
Manager.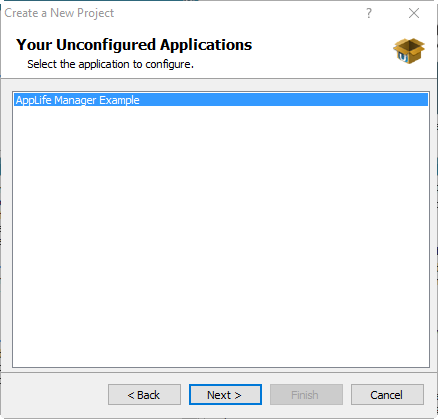
Select
the application and click Next to continue.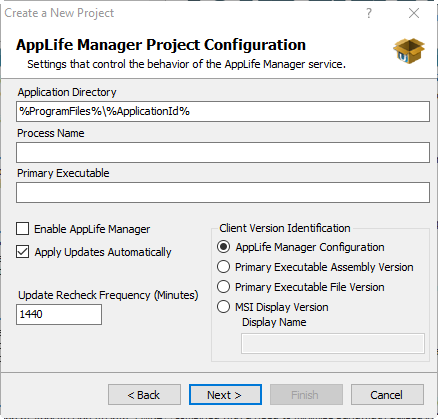
The next page in the wizard allows you
to configure most of the settings that govern how the application maintenance
process will operate within AppLife Manager.
Application Directory
This is the
directory that the AppLife Manager expects to find or install the application
to. For this example, we are going to modify the default value to be
%ProgramFiles%\AppLifeManagerExample
Process Name
The process name value is used
by the AppLife Manager to identify running instances of the application being
maintained, and if necessary, stop the process(s) before applying updates.
The download for this Quickstart includes version 1 and 2 of a simple
example. This example process is named ExampleApplication, so we
will set the value to that.
Primary Executable
Identifying the primary
executable allows AppLife Manager to launch the application and use the
assembly/file version of the primary executable for versioning. This value
can include a path relative to the identified Application Directory. For
this example, the primary executable will be located in the Application
Directory and will be named ExampleApplication.exe
Apply
Updates Automatically
AppLife Manager will download and apply updates
without any user intervention.
Update Recheck
Frequency
The default frequency is to check for updates once a day (every
1440 minutes). We’ll set this value to the lowest allowed (5 minutes) for
testing and experimentation.
For the rest of the settings, we’ll leave
the defaults.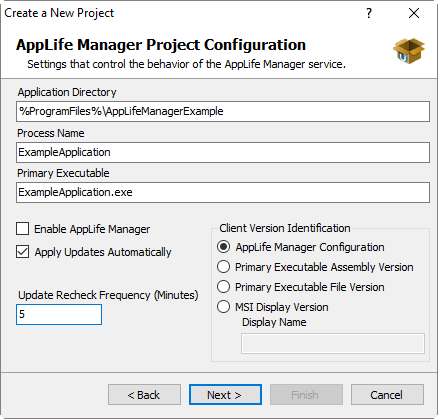
Click Next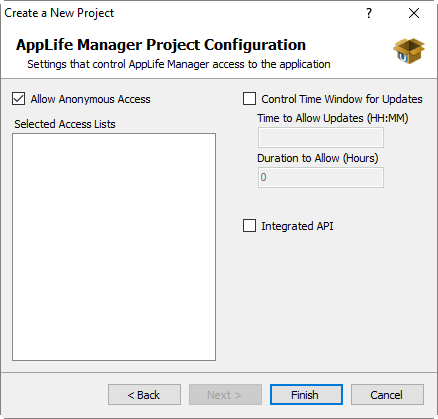
Access control can be defined using
Access Control Lists and Client Access Keys. The time window that updates
are allowed can also be defined. For now, we’ll leave the
defaults.
The AppLife Update API optionally allows applications to be
notified and interact with the AppLife Manager and applying updates.
This example will not integrate.
Click Finish to apply the settings to
the application.
3. With the New Project wizard completed, the application is configured on AppLife Server and we have an AppLife Update project file ready to start creating and publishing updates for the application. A few things to note here are:
a. The Application is still not enabled for AppLife Manager within the server configuration. We can toggle that when we are ready for deployed AppLife Managers to start “seeing” the application.
b. The newly created AppLife Update project contains the Private/Public key pair that is needed to create updates for this application. Backing up this file is highly recommended.
Notice that the update
project contains a Set Update Version action. This action was added
by the New Project wizard because the application is configured to use the
AppLife Manager configuration file for version identification. This action
will update the AppLife Manager configuration file as updates are
applied.
Deploying the application
To deploy this
application we are going to create an application that will target the scenario
where an AppLife Manager deployment first discovers the application. In this
scenario the AppLife Manager will have an effective version number of
0.0.0.0. Our first update will install version 1.0.0.0 of our example
application and will target any clients with a version number less than
1.0.0.0.
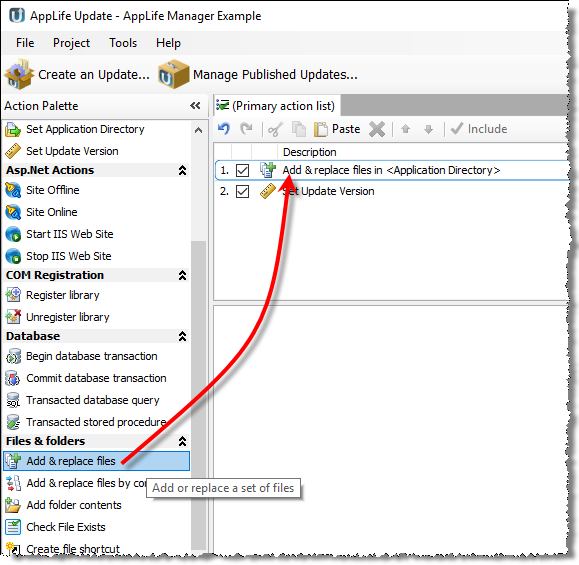
Actions to Include
We will include an action
that will:
1. Add the application assemblies to the identified application directory
2. Add a shortcut to the application in the All Users profile
3. Update the Version setting
Add an Add & Replace
Files action to the update by double clicking or dragging the action from
the Action Palette onto the action list.
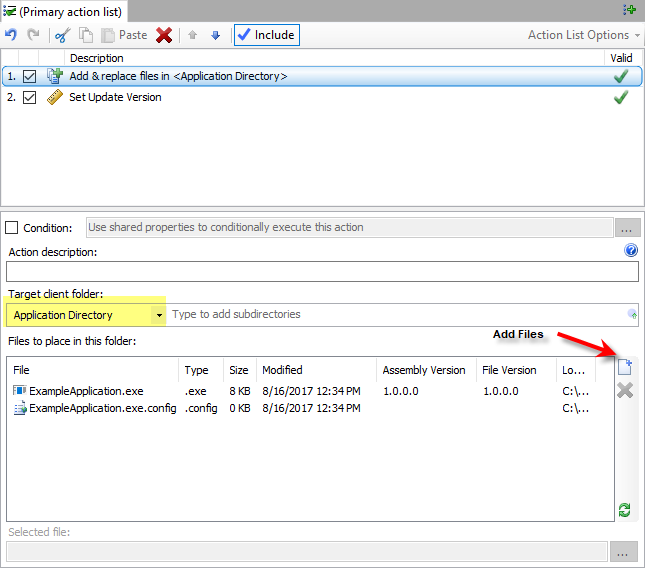
Add the version 1.0.0.0 executable and config file from the associated download.
ExampleApplication.exe
ExampleApplication.exe.config
The default Target Client
Folder is the configured application directory. If the folder doesn’t
exist on the deployed client, it will be created. Remember that we
configured the %ProgramFiles%\AppLifeManagerExample folder as the application
directory. This folder will be created when this first update is
applied.
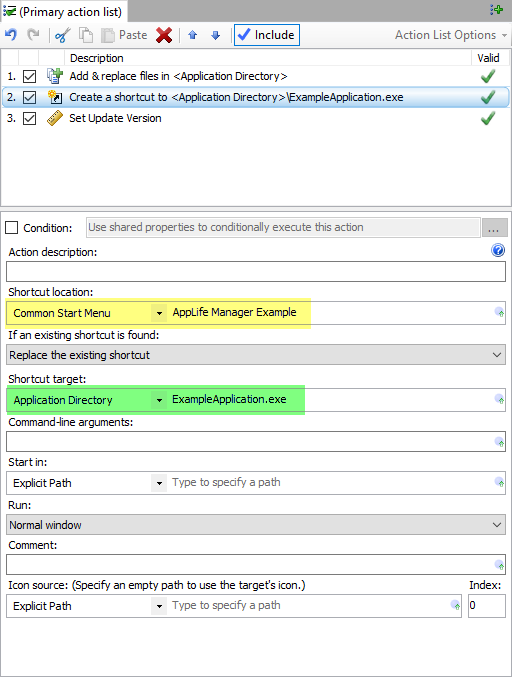
Add a Create File Shortcut action
to the update action list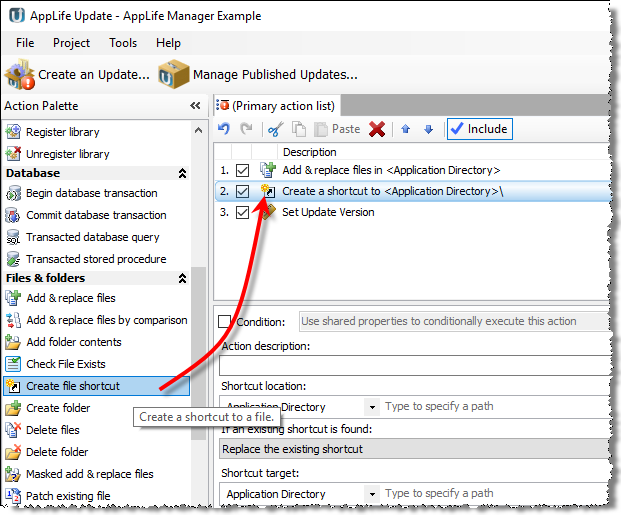
We will place the shortcut in the all users start menu.
Set the Shortcut location and the shortcut target
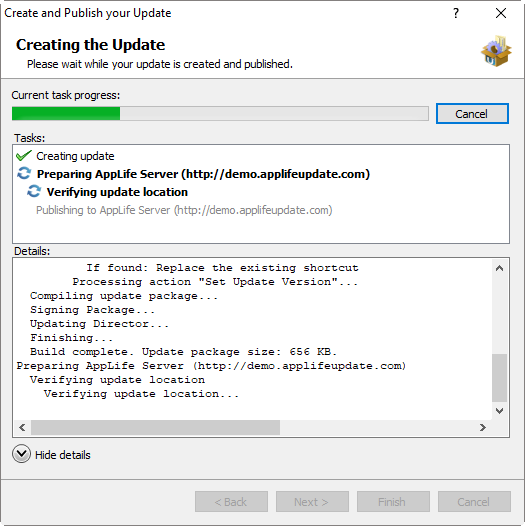
Build and Publish the
Update
Click the Create an Update… button to start the publish
wizard
Set the update version to 1.0.0.0 and the Versions to Update to Any Previous Version.
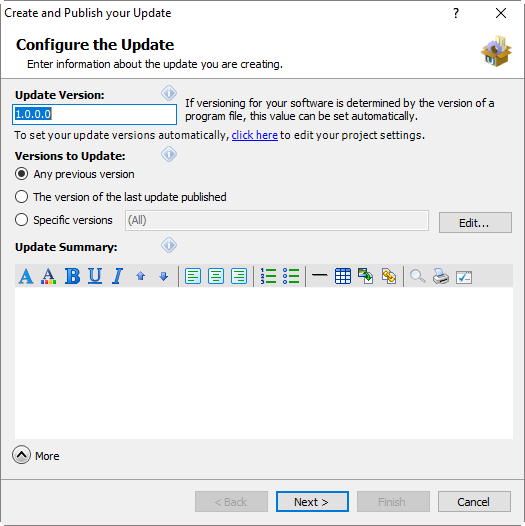
Click Next. The second wizard screen allows you to publish the update for specific Access Control Lists and set a few other features. We’ll accept the defaults and publish the update for general accessibility.
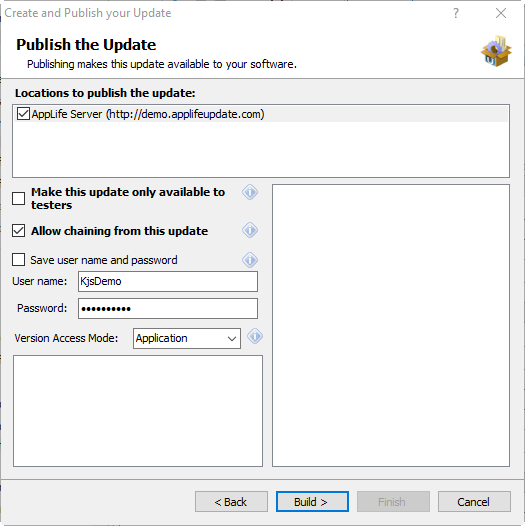
Click the Build Button to build and publish this new update.
With the update published, the application is ready for the AppLife Manager to discover, download and apply the update. Because the application is configured for anonymous access, any AppLife Manager configured to check this server for updates will find the application and install it. To enable this application, log into your server and toggle the Enable AppLife Manager Integration option.
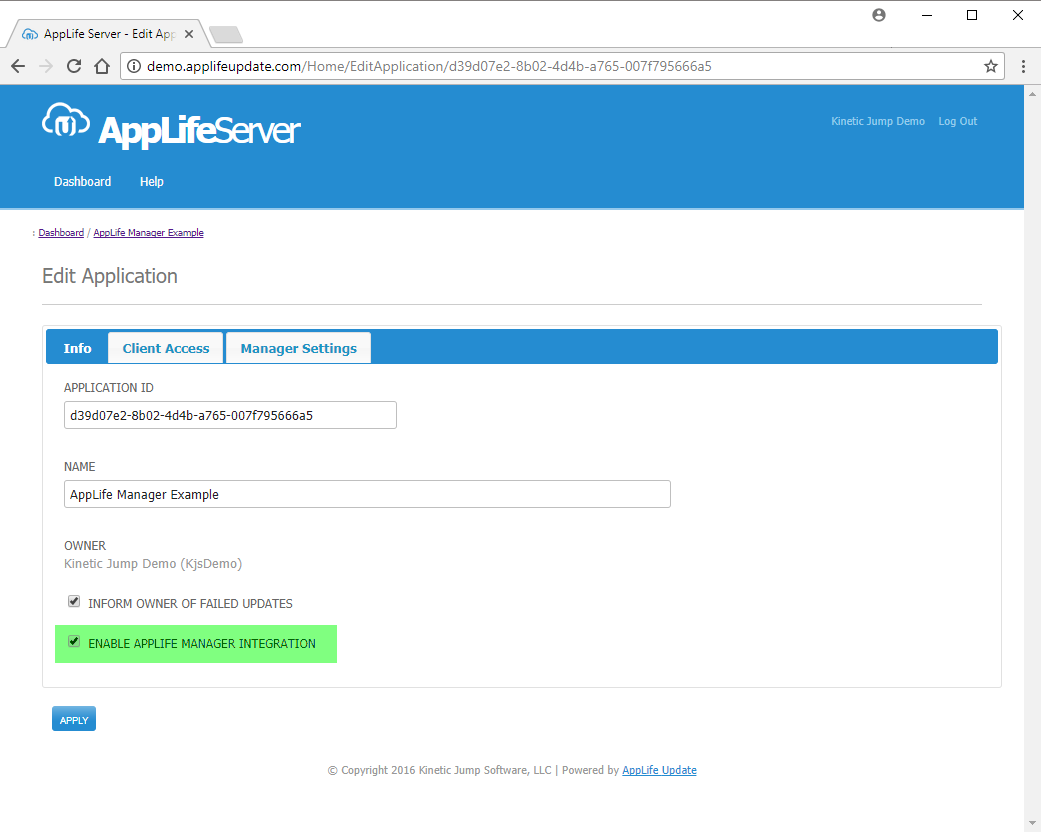
With the application enabled,
AppLife Manager can now “see” the application.
Building and Publishing
an update to Version 2.0.0.0
The update to version 2.0.0.0 will no
longer need the shortcut be placed, so lets remove that action.
Update the Add & Replace Files action to include the new version 2.0.0.0 files, then build update version 2.0.0.0 by clicking on the Create an Update… button.
With version 2.0.0.0 created, the AppLife Manager will automatically discover and apply the update to version 2.0.0.0. If version 1.0.0.0 is running, the user will be prompted before the update is applied. If running instances are shutdown, they will be restarted after the update completes under the same user context as was originally running under.